
Oh My Zsh + Pure - Rethink Your Windows Terminal Experience
Dec 31, 2025
Transform your Windows development environment with the perfect minimalist setup. This is the definitive guide to integrating the Pure prompt with Oh My Zsh specifically for Windows Terminal.
Prerequisites
Before starting, ensure you have the following installed:
- Git & Git Bash
- Windows Terminal (Configured with a Git Bash profile)
Step 1: Install Zsh on Windows
Since Windows doesn't include Zsh by default, we utilize the MSYS2 package.
- Download the zsh zip
.pkg.tar.zstfile from MSYS2 Zsh package. Exact the zip file (contents should have etc and usr directories). - Copy contents into your Git installation folder (usually
C:\Program Files\Git). Merge when asked, and normally it shouldn't replace files by doing so. - Verify Zsh installation by running this command in your terminal:
1zsh --version- Set Zsh as your default shell by appending this logic to your
~/.bashrcfile. If file is not present, create it from scratch.
1if [ -t 1 ]; then
2  exec zsh
3fi
Step 2: Deploy Oh My Zsh
Install the framework using the standard curl script:
1sh -c "$(curl -fsSL https://raw.githubusercontent.com/ohmyzsh/ohmyzsh/master/tools/install.sh)"Step 3: Enhance with Plugins
We’ll add Autosuggestions and Syntax Highlighting to improve the UX.
- Clone the repositories:
1git clone https://github.com/zsh-users/zsh-autosuggestions ~/.oh-my-zsh/custom/plugins/zsh-autosuggestions
2git clone https://github.com/zsh-users/zsh-syntax-highlighting ~/.oh-my-zsh/custom/plugins/zsh-syntax-highlighting- Update your configuration: Open
~/.zshrcand update the plugins array:
1plugins=(git zsh-autosuggestions zsh-syntax-highlighting)If you experience display issues with zsh-autosuggestions, downgrade to version v0.6.4:
1cd ~/.oh-my-zsh/plugins/zsh-autosuggestions
2git checkout tags/v0.6.4 -b v0.6.4-branch
Fix Encoding Issues
If you see strange characters in your terminal, add this to ~/.bashrc before setting Zsh as the default shell:
1/c/Windows/System32/chcp.com 65001 > /dev/null 2>&1Step 4: Install the Pure Theme & Fonts
Pure provides a clean, high-performance prompt. To use it with Oh My Zsh on Windows, follow these manual steps:
- Clear the default theme in
~/.zshrc:
1ZSH_THEME=""- Clone Pure into
~/.zsh/pureand make Pure scripts accessible via symlinks (if you get File already exists error, move forward).
1git clone https://github.com/sindresorhus/pure.git "$HOME/.zsh/pure"
2cd ~/.zsh/pure
3ln -s "$HOME/.zsh/pure/pure.zsh" "$HOME/.zsh/pure/prompt_pure_setup"
4ln -s "$HOME/.zsh/pure/async.zsh" "$HOME/.zsh/pure/async"- Initialize pure by adding this to the end of
~/.zshrc:
1fpath=($HOME/.zsh/pure $fpath)
2autoload -U promptinit; promptinit
3prompt pure
Restart your terminal and Pure should be loaded without any errors.
If you see prompt_pure_setup:1: command not found: pure.zsh, it means Zsh found the file prompt_pure_setup, but it can't find pure.zsh to execute it, even though they are in the same folder. We need to fix broken symlinks; run these commands in terminal.
1cd "$HOME/.zsh/pure"
2rm prompt_pure_setup
3rm async
4cp pure.zsh prompt_pure_setup
5cp async.zsh async
Because you are on Windows, ln -s sometimes creates a "plain text file" that looks like a link to Windows but is unreadable by Zsh. We just replace the links with actual copies. Now when you restart the terminal, Pure should load without any errors.
Install Fonts
Clone and install Powerline fonts:
1git clone https://github.com/powerline/fonts.git --depth=1 cd fonts ./install.shStep 5: Customization & Visuals
Give your terminal the personalized look. This is where your personal preferences come into play. If colors look dull, don't worry this is because of your Windows terminal color scheme.
While on Windows terminal, press Ctrl + , to open settings. In the sidebar under Profiles section, select Defaults tab. Expand Appearance section. You can select different color schemes and see what is best for your self.
My personal preference is Dark+ and it also goes well with custom syntax colors i have provided below.
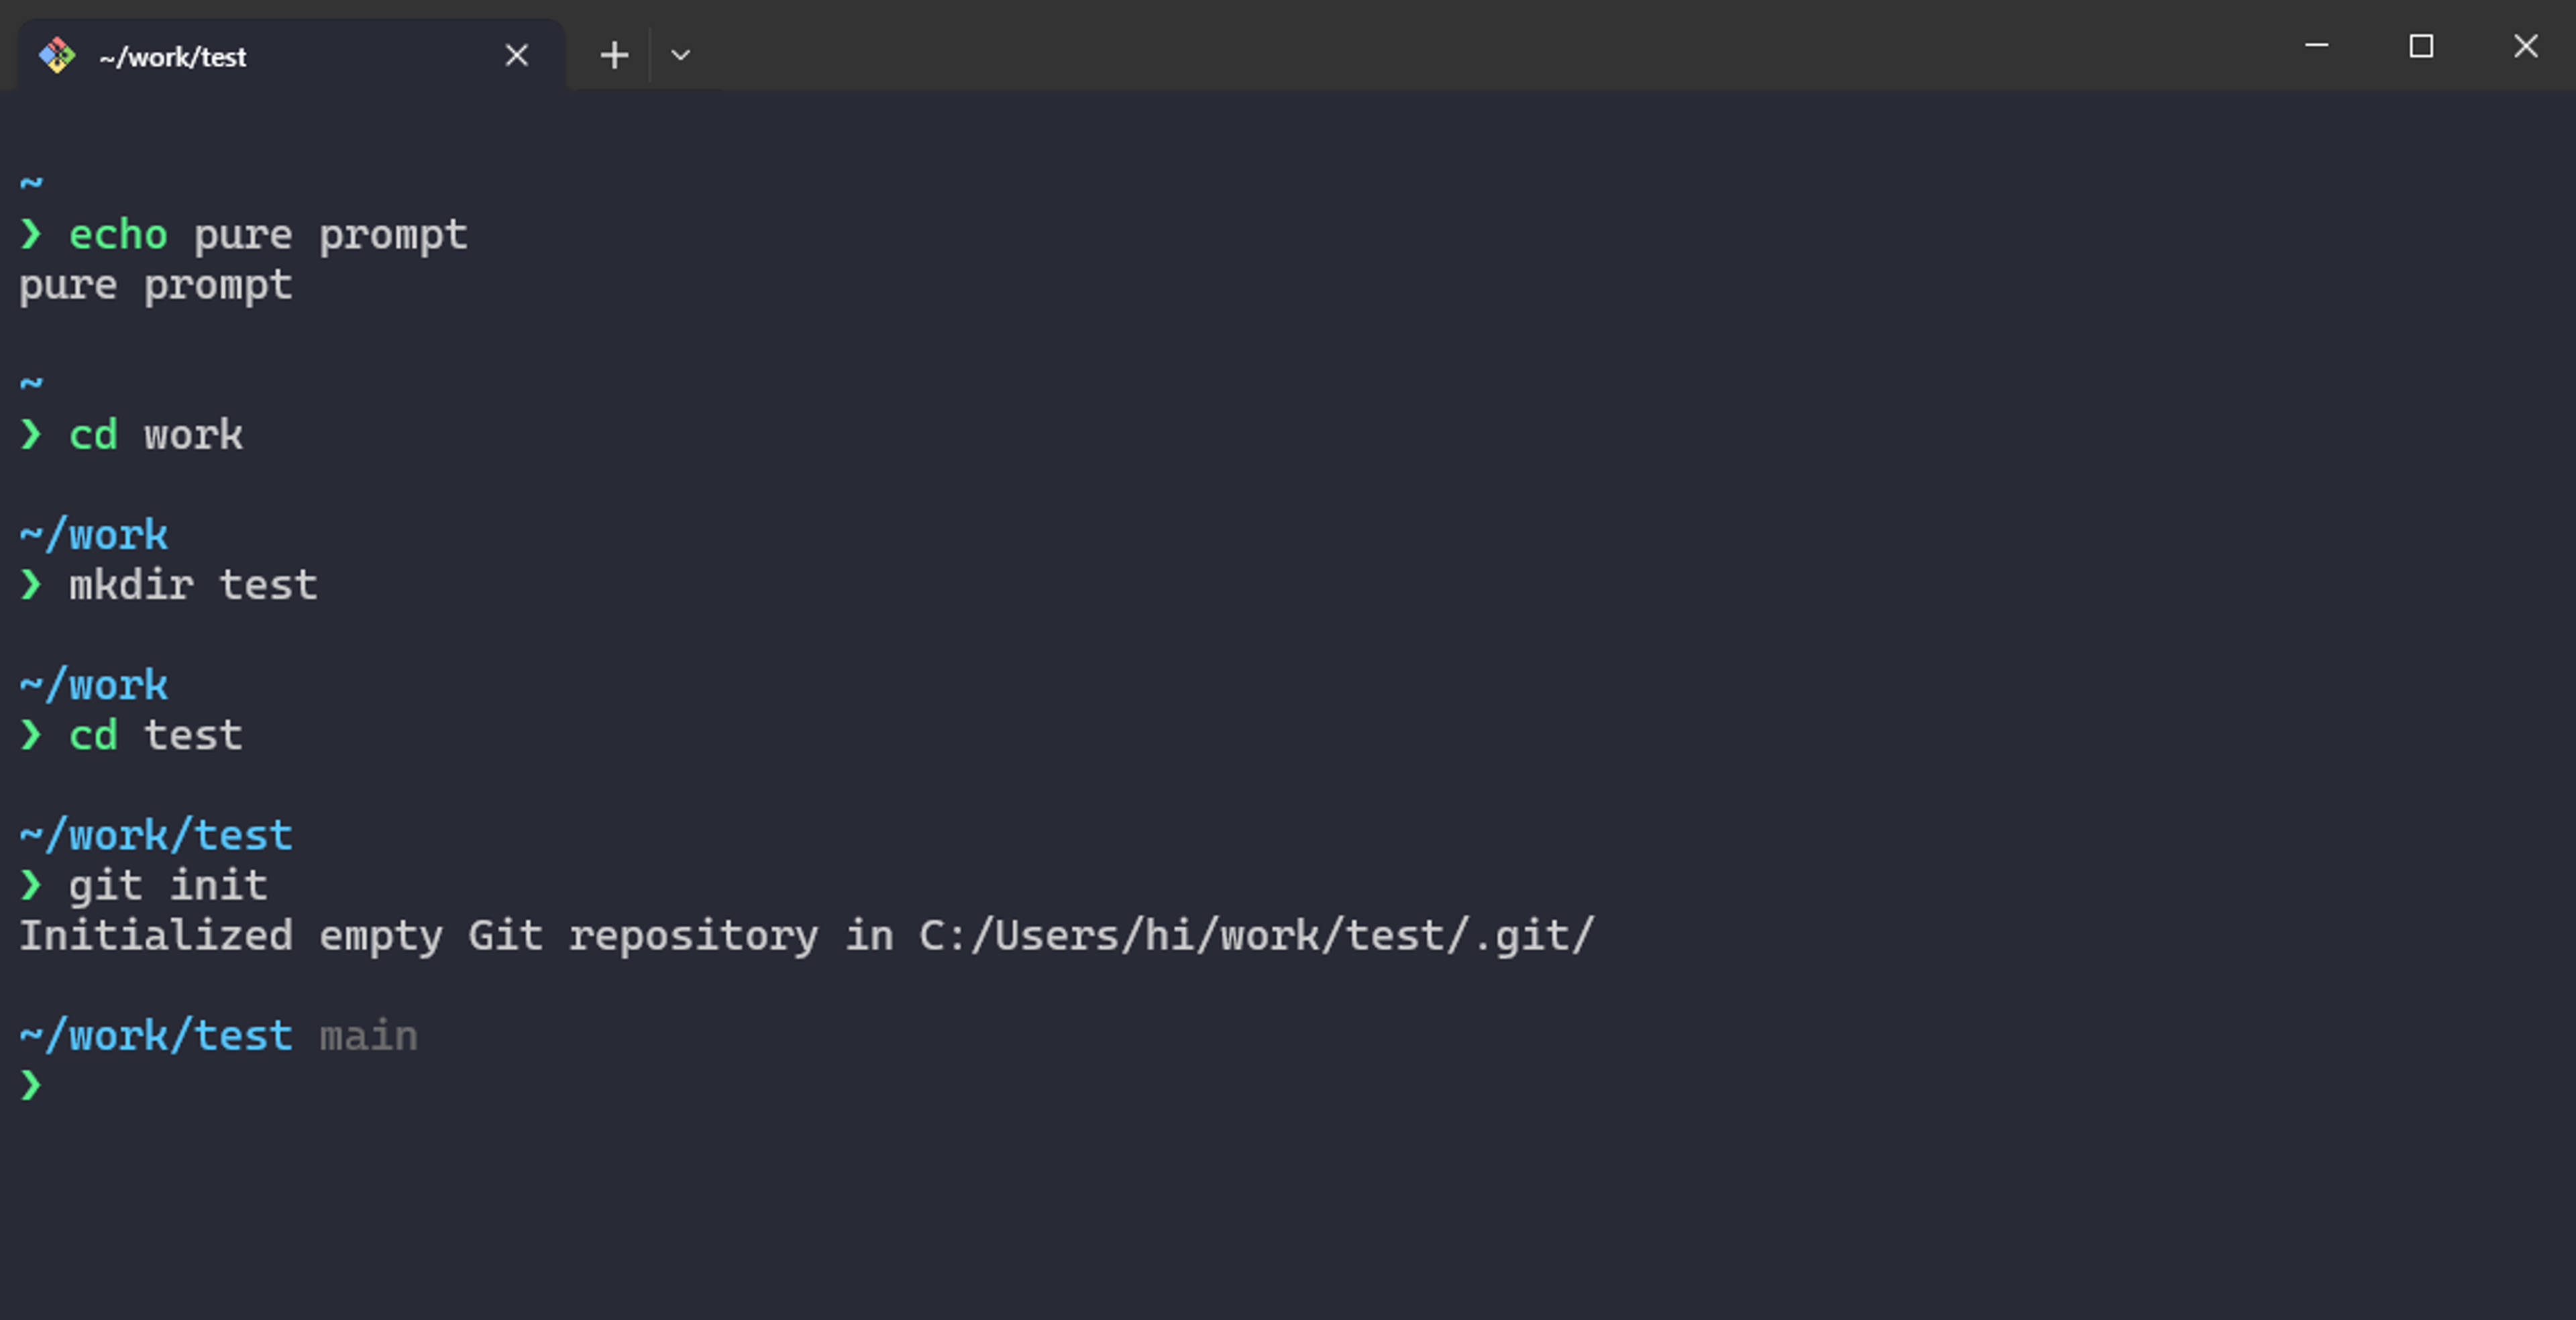
Before:
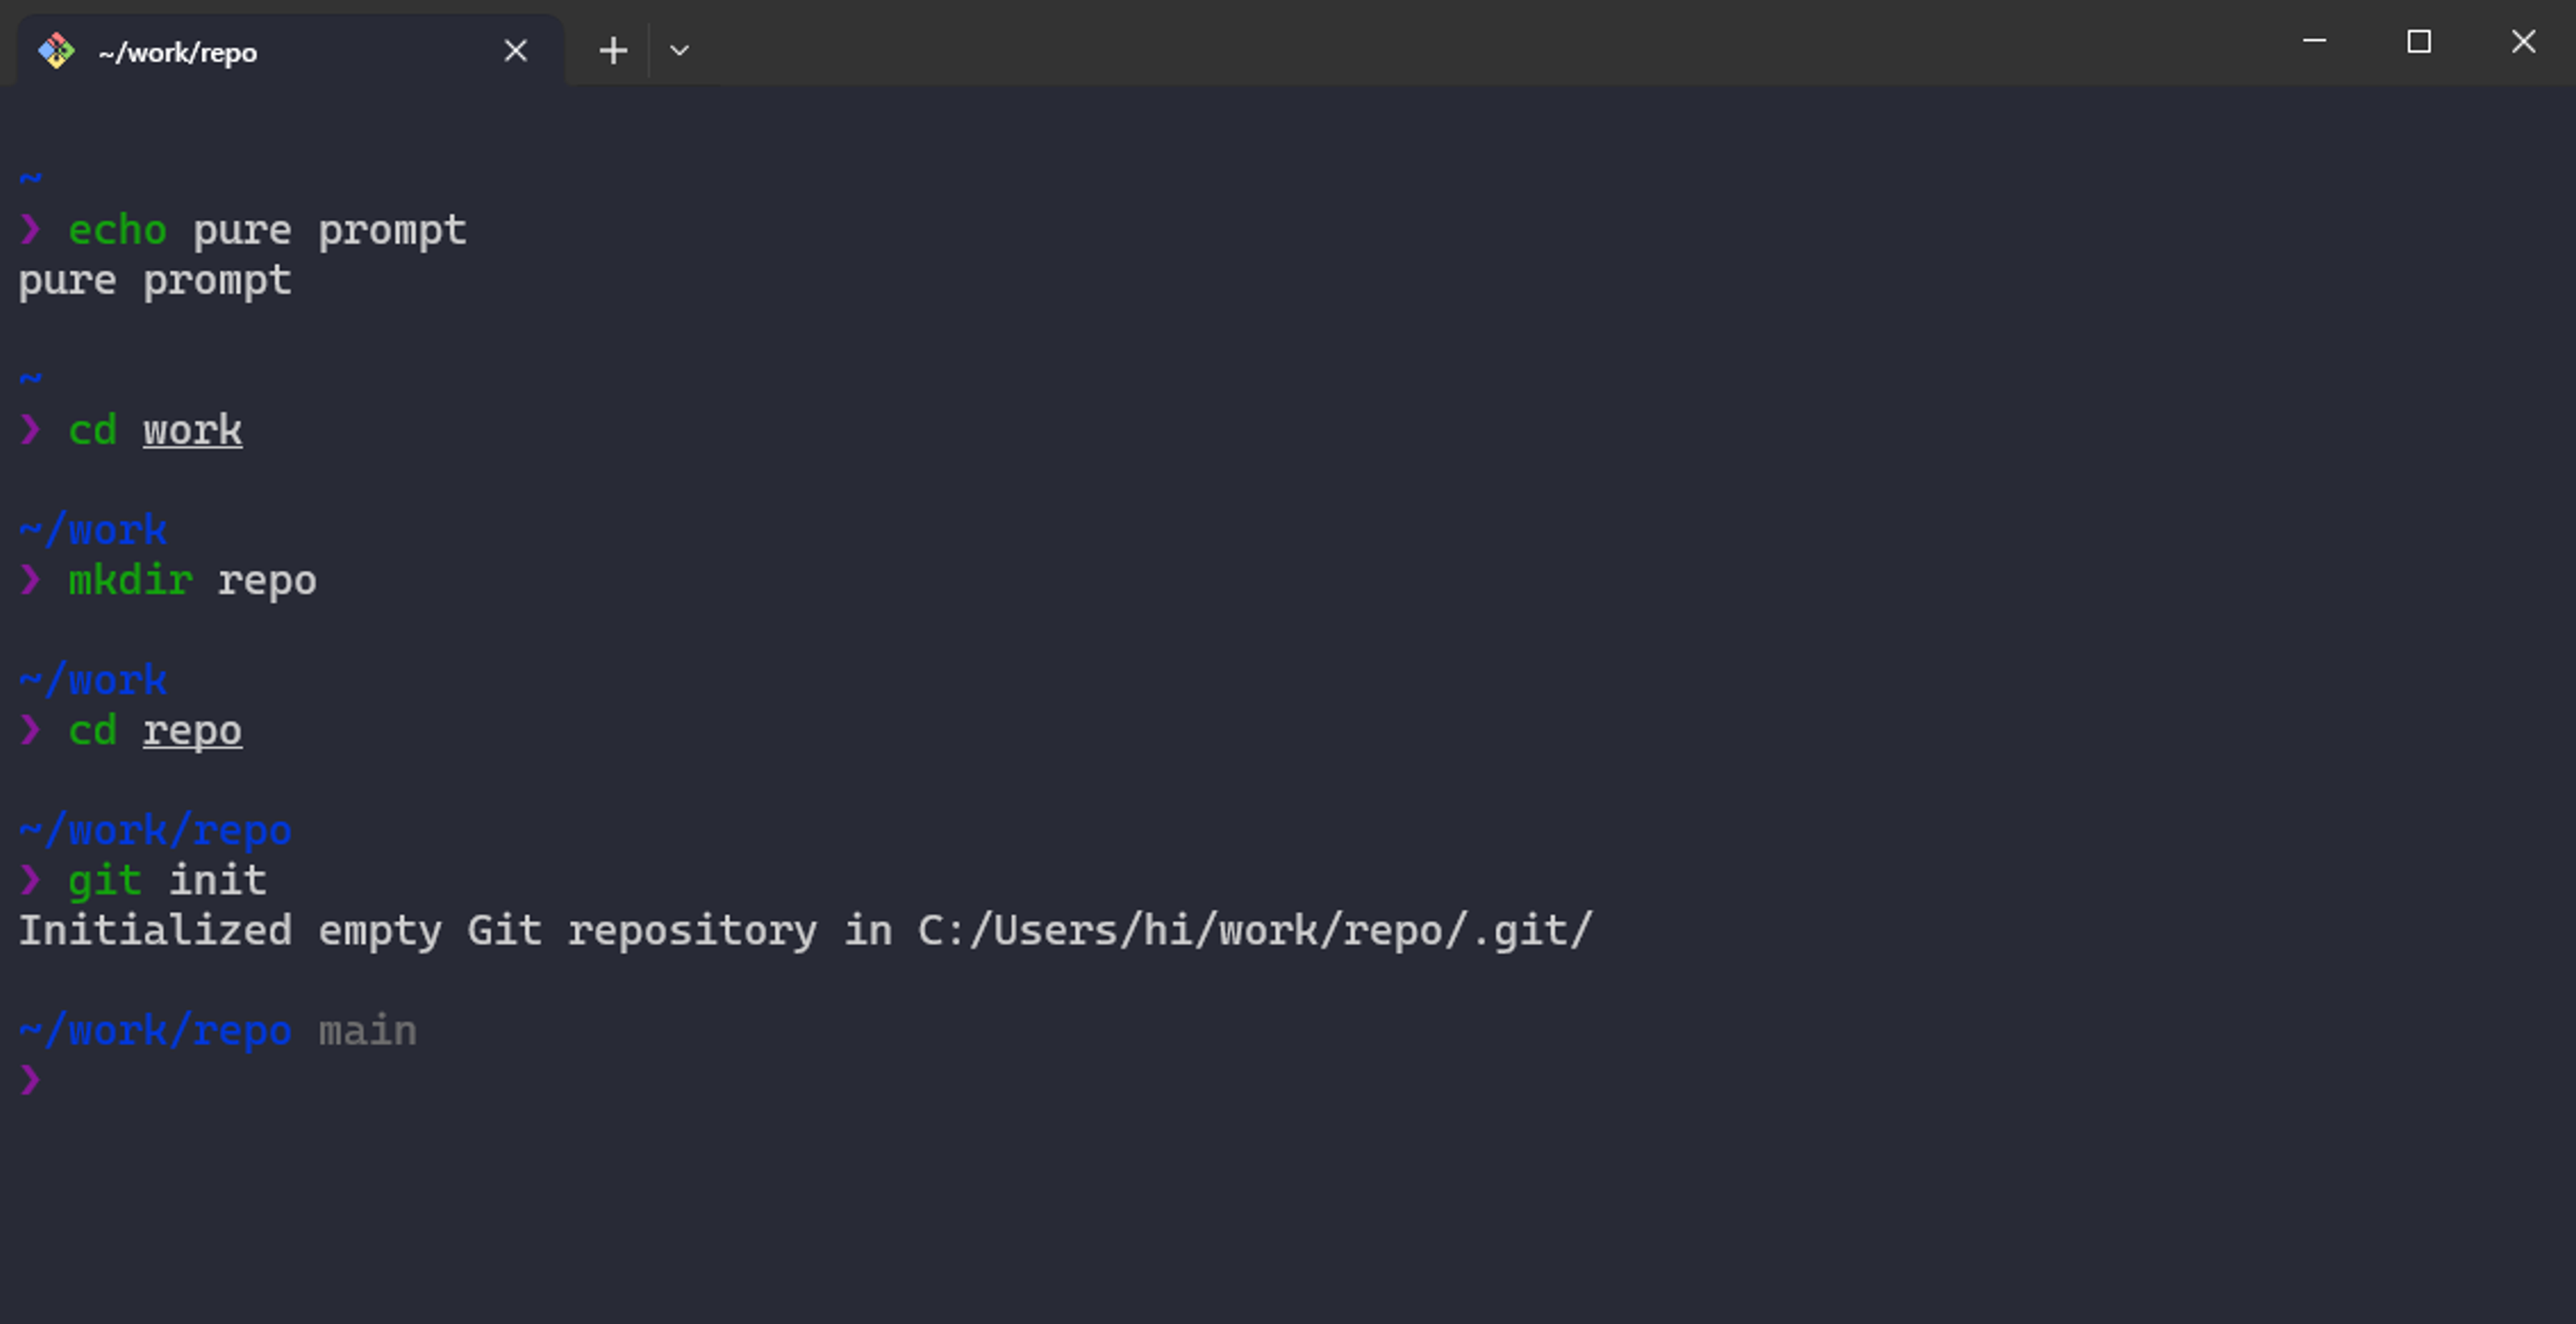
After:
Custom Syntax Colors
To customize syntax highlighting, add this to ~/.zshrc:
1# Customize Syntax Highlighting
2
3ZSH_HIGHLIGHT_STYLES[builtin]='fg=#5AF68E'
4ZSH_HIGHLIGHT_STYLES[function]='fg=#5AF68E'
5ZSH_HIGHLIGHT_STYLES[command]='fg=white'
6ZSH_HIGHLIGHT_STYLES[precommand]='fg=#5AF68E'
7ZSH_HIGHLIGHT_STYLES[commandseparator]='fg=#5AF68E'
8ZSH_HIGHLIGHT_STYLES[path]='fg=white'
9ZSH_HIGHLIGHT_STYLES[unknown-token]='fg=#6ef79c'
10ZSH_HIGHLIGHT_STYLES[single-hyphen-option]='fg=#57C7FF'
11ZSH_HIGHLIGHT_STYLES[double-hyphen-option]='fg=#57C7FF'
To customize Pure's prompt colors, add this before prompt pure in ~/.zshrc:
Note:You can use this official colors chart from official Pure repo.
1# Customize Pure Prompt Colors
2
3zstyle :prompt:pure:path color "#57C7FF"
4zstyle ':prompt:pure:prompt:*' color "#59F28C"
5zstyle ':prompt:pure:git:branch' color 242
6zstyle ':prompt:pure:git:dirty' color 242
7zstyle ':prompt:pure:git:arrow' color "#99EBFC"
8
9# Additionally show git stash chunk in terminal
10zstyle :prompt:pure:git:stash show yes
See ya ✌