
Implementing i18n in Next.js 15 (App) using i18next
May 22, 2025
•3 min read
If you’ve made it to this article, you’re probably working on a multilingual site in Next.js 15+ using the new App Router. Good news: you’re in the right place. We're going to integrate internationalization (i18n) using i18next, react-i18next, next-i18n-router, and i18next-resources-to-backend.
Let’s build a setup that works on both server and client, doesn’t download translations twice, and won’t drive you (or your future self) crazy.
Initial Setup & Middleware Configuration
Step 1: Create a new Next.js App
Use the latest Next.js setup tool by running:
1npx create-next-app@latest my-next-i18n-appThis command will set up a fresh Next.js 15+ project with App Router.
Installing Dependencies
Before diving into the implementation, install the required packages:
1npm install i18next react-i18next i18next-resources-to-backend next-i18n-routerOr if you're using Yarn:
1yarn add i18next react-i18next i18next-resources-to-backend next-i18n-routerStep 2: Add a Dynamic Locale Route
Next, structure your application to support multiple languages dynamically. In the app directory, create a dynamic route folder named [locale]. Your directory structure will look like this:
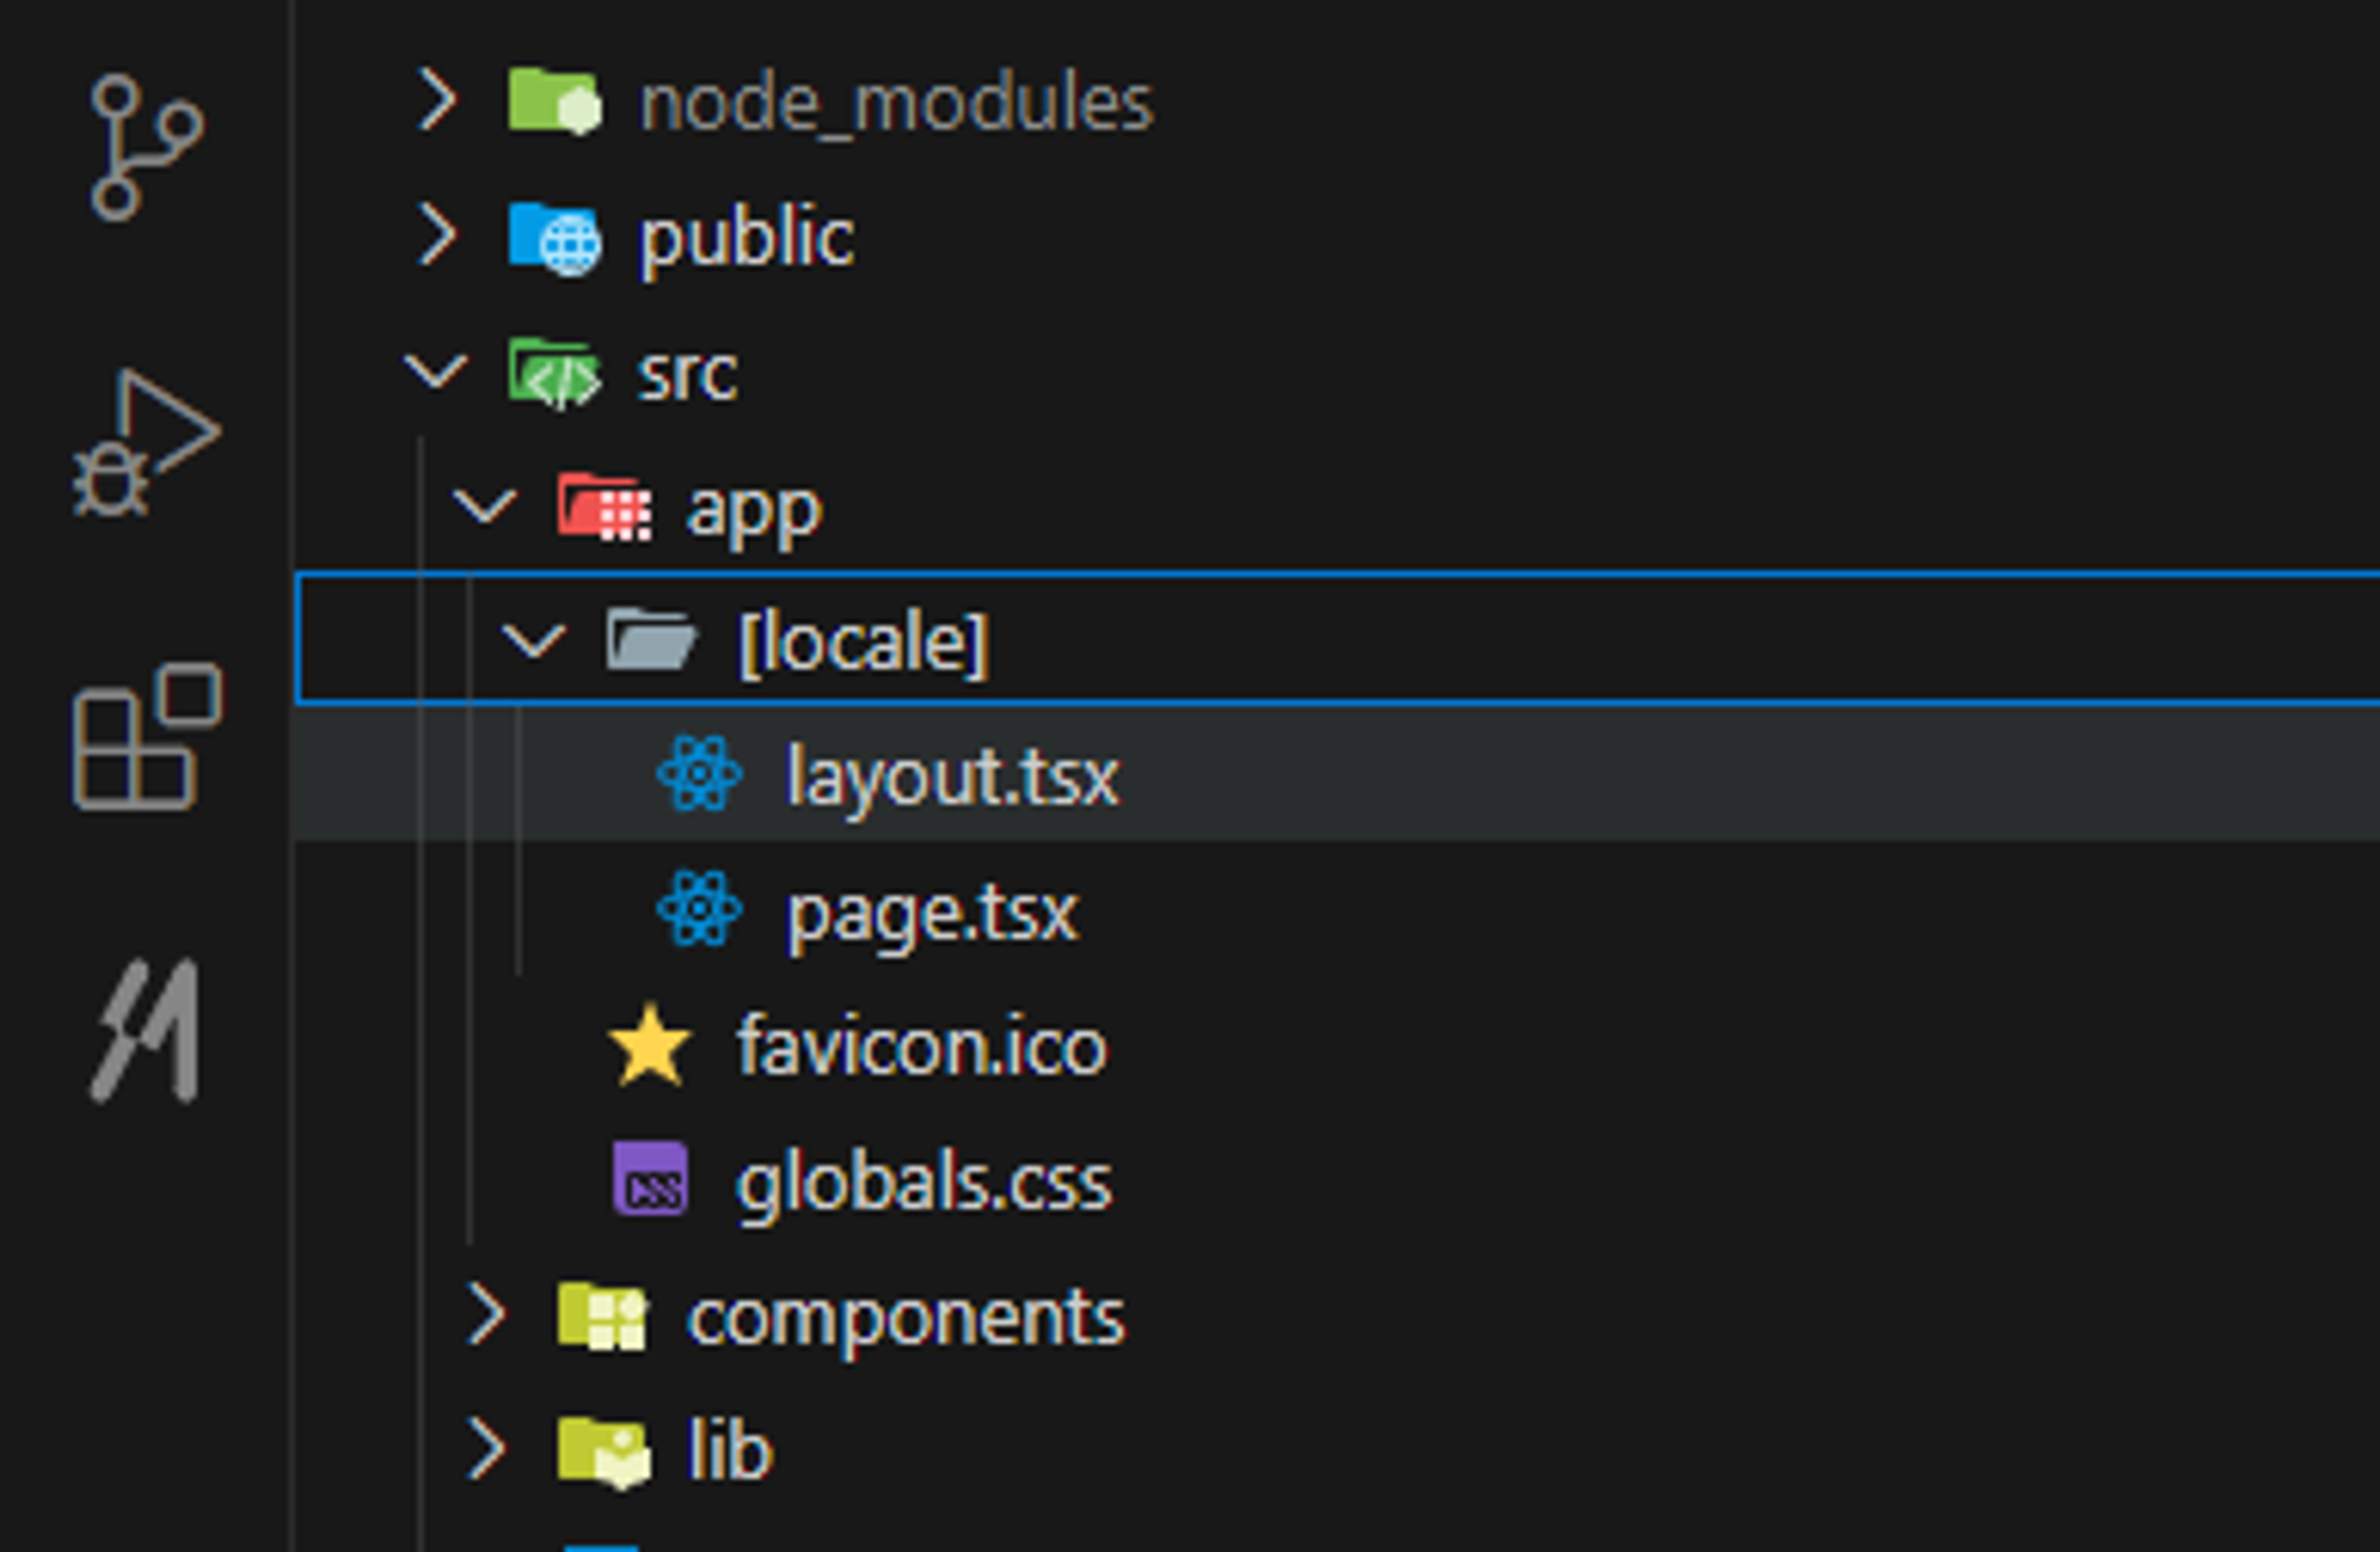
This setup allows the app to handle different locales based on URL segments (/en, /ar, etc.).
Step 3: Create an i18n Configuration File
To manage locales, create a configuration file with your supported locales, default locale. For this guides purpose, we will assume you are using src directory.
Create src/lib/i18n/index.ts with this content.
1import { AllowedLocales, Locale, I18NConfig } from "@/lib/types";
2
3export const defaultLocale = "en";
4
5export const allowedLocales: AllowedLocales = [defaultLocale, "ar"];
6
7const i18nConfig: I18NConfig = {
8  locales: allowedLocales,
9  defaultLocale,
10  prefixDefault: false, // avoids prefixing the default locale in URLs
11};
12
13export { i18nConfig };
Now it's time to define types. Create another file src/lib/types/index.ts
1export type Locale = "en" | "ar";
2
3export type AllowedLocales = Locale[];
4
5export type I18NConfig = {
6  locales: string[];
7  defaultLocale: string;
8  prefixDefault: boolean;
9};
Step 4: Middleware Setup for Locale Route Handling
To automatically handle locale-specific routing, create a middleware file at the root level src/middleware.ts:
1import { i18nRouter } from "next-i18n-router";
2import { i18nConfig } from "./lib/i18n/index";
3
4export function middleware(request: any) {
5  return i18nRouter(request, i18nConfig);
6}
7
8// Apply middleware only to relevant routes (excluding API, static files, and internal Next.js paths)
9export const config = {
10  matcher: "/((?!api|static|.*\\..*|_next).*)",
11};
Explanation:
- This middleware intercepts incoming requests, checks for locale information, and automatically routes the request to the appropriate locale-based path.
- The
matcherensures the middleware doesn't interfere with API endpoints or static assets.
Step 5: Set lang and dir inside Root Layout
Next we need to set lang and dir attribute on <html> tag inside root layout. For that we will write a utility function that gives us direction for active locale.
Inside src/lib/utils/index.ts
1import type { Locale } from "../types";
2
3export function getDirection(locale: Locale) {
4  if (locale === "ar") {
5    return "rtl";
6  }
7  return "ltr";
8}
Let's use this utility function inside src/app/[locale]/layout.tsx which is also root layout of the Next.js app.
1import { getDirection } from "@/lib/utils";
2import { Locale } from "@/lib/types";
3
4type RootLayoutProps = {
5  children: React.ReactNode;
6  params: Promise<{ locale: Locale }>;
7};
8
9export default async function RootLayout({
10  children,
11  params,
12}: RootLayoutProps) {
13  const { locale } = await params;
14  return (
15    <html lang={locale} dir={getDirection(locale)}>
16      <body
17        className={`${geistSans.variable} ${geistMono.variable} antialiased`}
18      >
19          {children}
20      </body>
21    </html>
22  );
23}
Step 6: Add translations
Next we will add translations as JSON files inside src/lib/i18n/transalations that we will read in next steps. Create a structured directory to organize your translation JSON files:
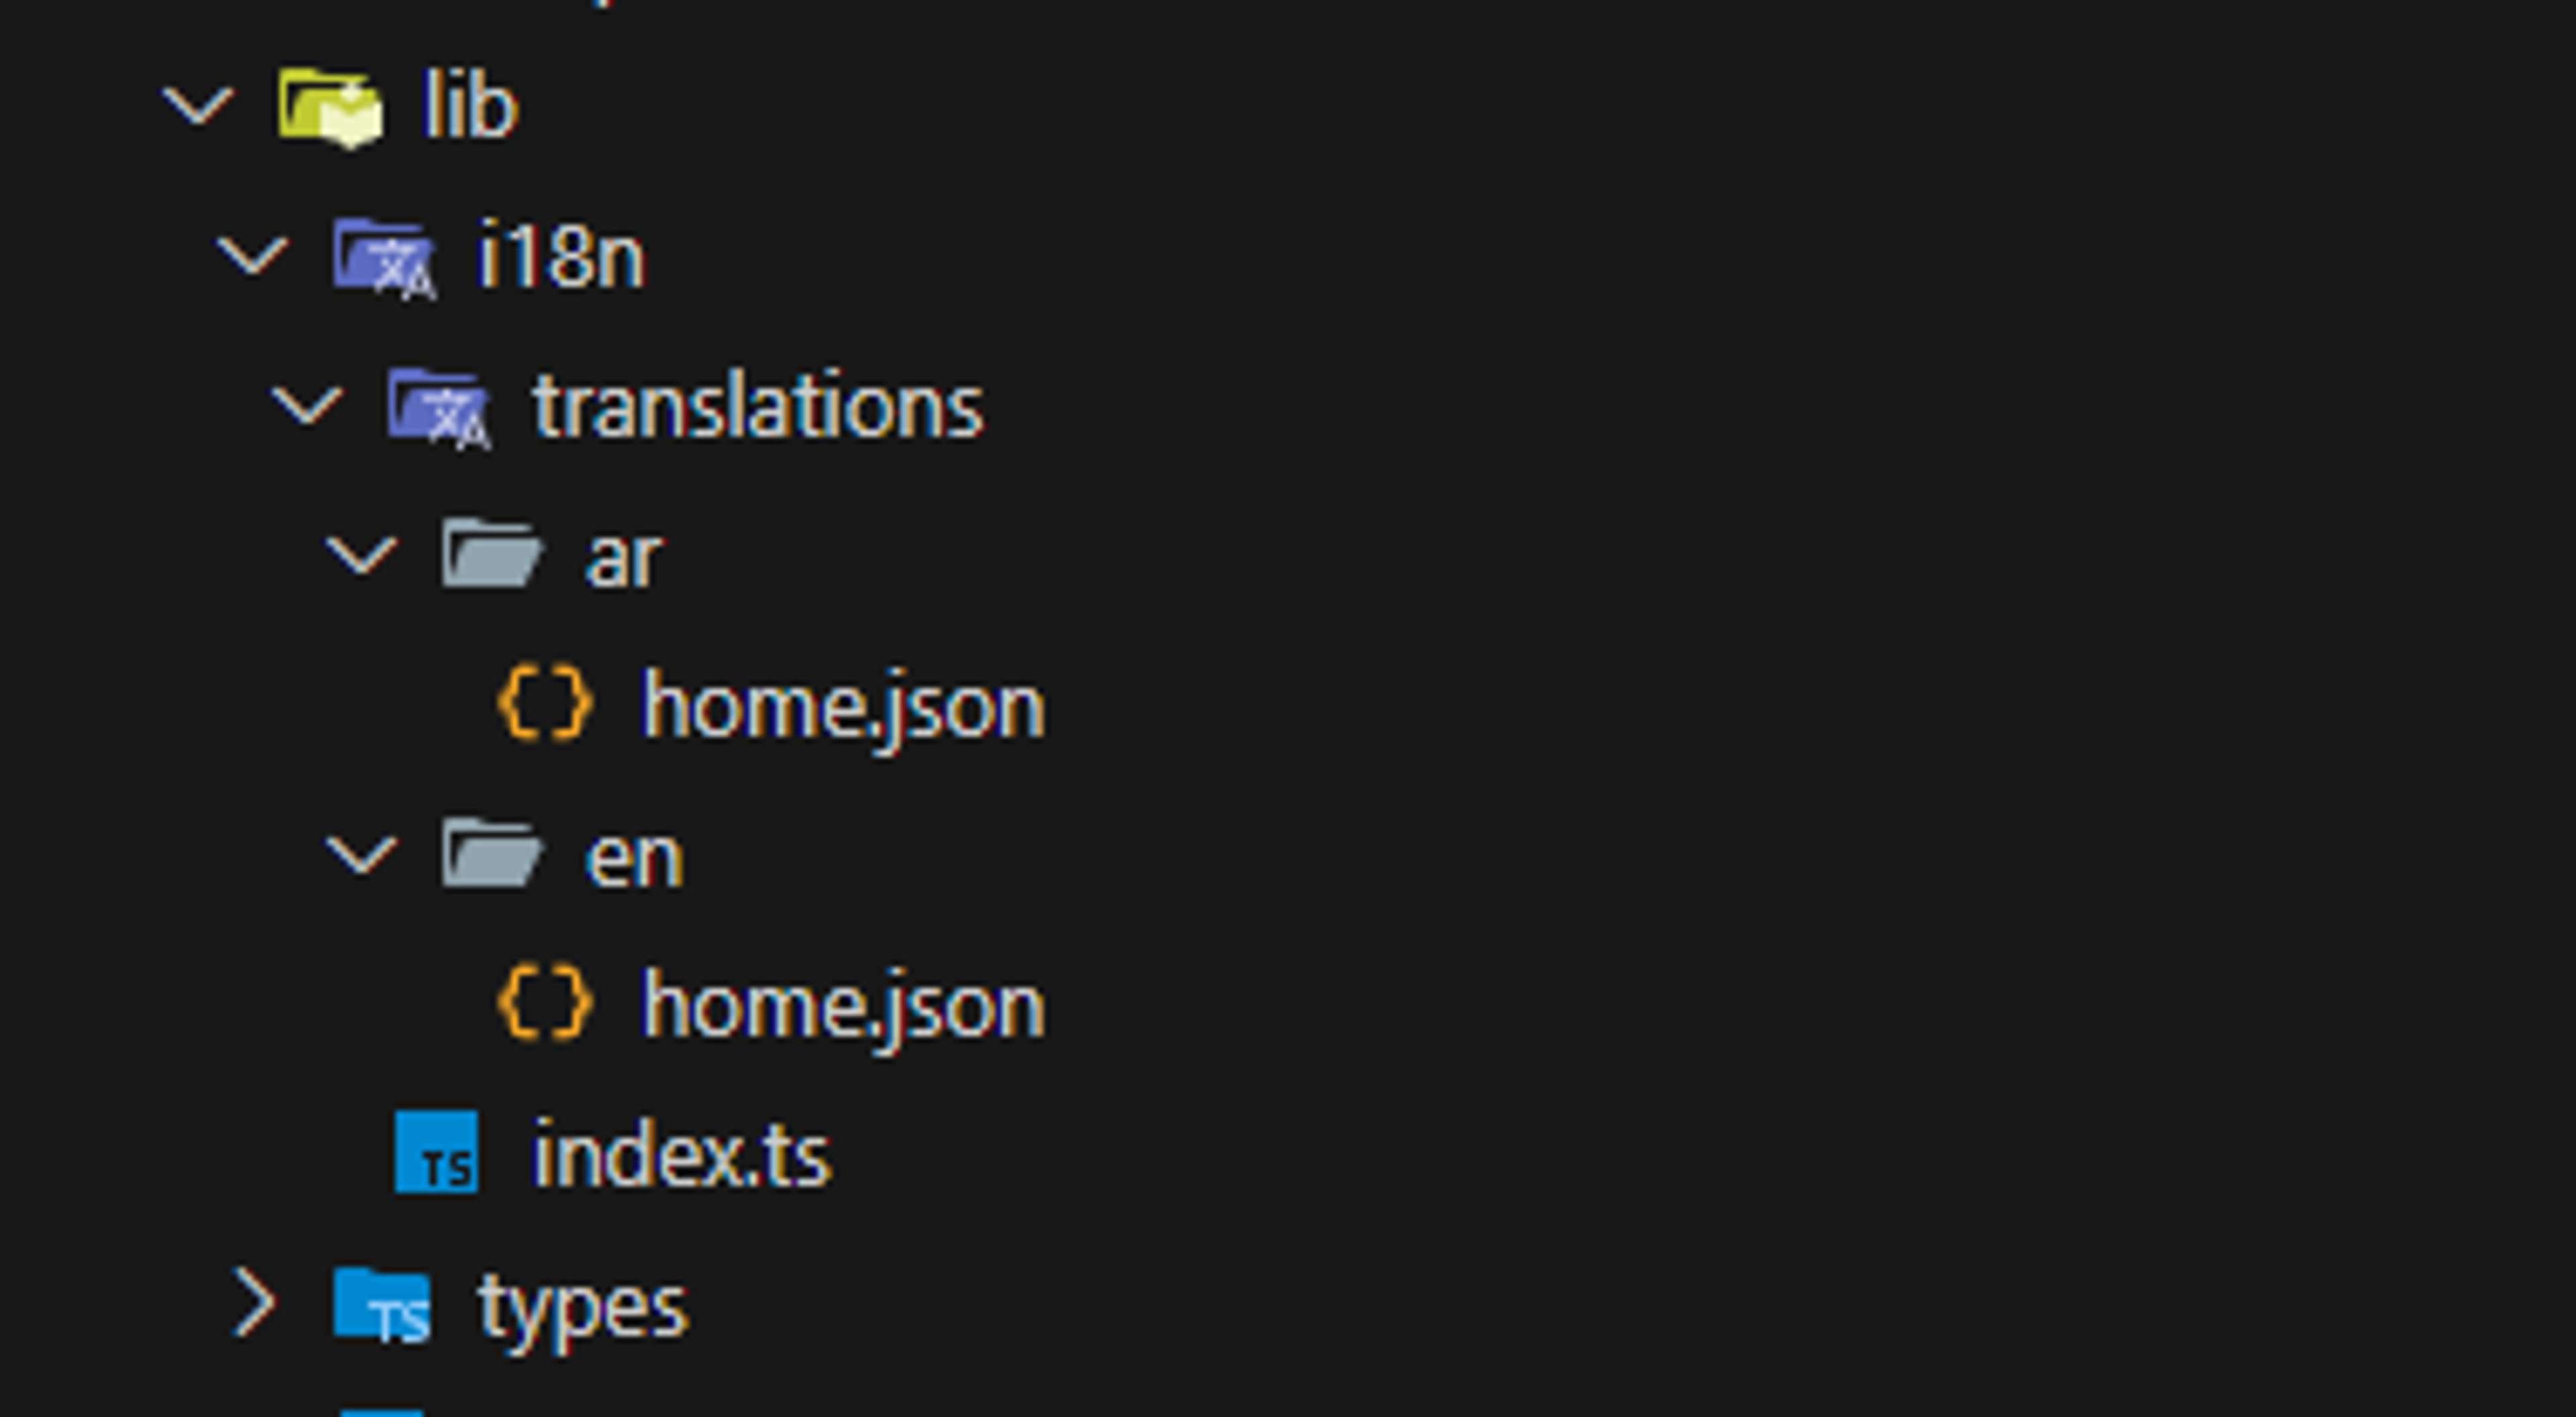
/translations/en/home.json
1{
2  "welcome": "Welcome",
3  "description": "This is an English description."
4}
/translations/ar/home.json
1{
2  "welcome": "مرحبا",
3  "description": "هذا وصف باللغة العربية."
4}
Server side Internationalization (i18n)
In Next.js App Router, translations are loaded by default on the server side. Let's see how you can efficiently manage and consume translations.
Step 1: Create Server-side Translation Utility
Next, implement a utility that initializes and fetches translations server-side. We will export serverSideTranslation from src/lib/i18n/index.ts which helps us load translations anywhere on server (components, functions like generateMetadata).
src/lib/i18n/index.ts
1import { createInstance, TFunction } from "i18next";
2import { initReactI18next } from "react-i18next/initReactI18next";
3import resourcesToBackend from "i18next-resources-to-backend";
4import { i18nConfig } from "@/lib/i18n/index";
5import { Locale } from "../types/i18n";
6
7async function initTranslations(
8  locale: string,
9  namespaces: string[],
10  options?: { keyPrefix?: string; i18nInstance?: any; resources?: any }
11) {
12  const i18nInstance = options?.i18nInstance || createInstance();
13
14  i18nInstance.use(initReactI18next);
15
16  if (!options?.resources) {
17    i18nInstance.use(
18      resourcesToBackend(
19        (language: string, namespace: string) =>
20          import(`@/lib/i18n/translations/${language}/${namespace}.json`)
21      )
22    );
23  }
24
25  await i18nInstance.init({
26    lng: locale,
27    resources: options?.resources,
28    fallbackLng: i18nConfig.defaultLocale,
29    supportedLngs: i18nConfig.locales,
30    defaultNS: namespaces[0],
31    fallbackNS: namespaces[0],
32    ns: namespaces,
33    preload: options?.resources ? [] : i18nConfig.locales,
34  });
35
36  return {
37    i18n: i18nInstance,
38    resources: i18nInstance.services.resourceStore.data,
39    t: i18nInstance.getFixedT(
40      locale,
41      namespaces[0],
42      options?.keyPrefix
43    ) as TFunction<Locale, undefined>,
44  };
45}
46
47// Exported function to fetch translations on server components
48export async function serverSideTranslation(
49  locale: string,
50  namespaces: string[],
51  options?: { keyPrefix?: string; i18nInstance?: any; resources?: any }
52) {
53  return await initTranslations(locale, namespaces, options);
54}
Step 2: Consuming Translations in Server Components
To use these translations in your server components, for example inside home page (src/app/[locale]/page.tsx)
1import { serverSideTranslation } from "@/lib/i18n";
2
3type Props = {
4  params: Promise<{ locale: string }>
5}
6
7export default async function Page({ params }: Props) {
8  const {locale} = await params
9  const ns = ["home"]; // namespace used for this page
10  const { t } = await serverSideTranslation(locale, ns);
11
12  return (
13    <div>
14      <h1>{t("welcome")}</h1>
15      <p>{t("description")}</p>
16    </div>
17  );
18}
Explanation:
locale: Comes directly from the dynamic route params ([locale]).ns: The namespace corresponds to the JSON translation file (home.json).t: Translation function returned fromserverSideTranslation.
Client-side Internationalization (i18n)
Why Send Translations to the Client?
In Next.js App Router, translations are loaded server-side by default. However, your client-side components (interactive components, buttons, inputs, etc.) also need access to translations. To achieve this, you'll pass translations from the server to the client via a wrapper provider.
Step 1: Create the Client-side Translation Provider
Create a wrapper component (I18NProvider) that passes translations from server-side to client-side components:
Create new file src/components/i18n/i18n-provider.tsx
1"use client";
2
3import { I18nextProvider } from "react-i18next";
4import { createInstance } from "i18next";
5import { serverSideTranslation } from "@/lib/i18n";
6
7type Props = {
8  children: React.ReactNode;
9  locale: string;
10  namespaces: string[];
11  resources: any;
12};
13
14export default function I18NProvider({
15  children,
16  locale,
17  namespaces,
18  resources,
19}: Props) {
20  const i18n = createInstance();
21
22  // Initialize client-side i18n instance with resources provided by the server
23  serverSideTranslation(locale, namespaces, { i18nInstance: i18n, resources });
24
25  return (
26    <I18nextProvider i18n={i18n}>
27      {children}
28    </I18nextProvider>
29  );
30}
31
Explanation:
- Uses
createInstance()fromi18nextto initialize a new client-side i18n instance. - Reuses server-loaded translations by passing
resourcesdirectly to the client, avoiding extra client-side fetches.
Step 2: Wrap Your Client Components
In your server components (or page, layouts), wrap your client-side tree using the I18NProvider created above:
1import { serverSideTranslation } from "@/lib/i18n";
2import ClientComponent from "./client-component"
3
4type Props = {
5  params: Promise<{ locale: string }>
6}
7
8export default async function Page({ params }: Props) {
9  const {locale} = await params
10  const ns = ["home"]; // namespace used for this page
11  const { t, resources } = await serverSideTranslation(locale, ns);
12
13  return (
14    <div>
15      <h1>{t("welcome")}</h1>
16      <p>{t("description")}</p>
17
18      <I18NProvider locale={locale} namespaces={ns} resources={resources}>
19        <ClientComponent />
20      </I18NProvider>
21    </div>
22  );
23}
Explanation:
- Page fetches translations server-side via
serverSideTranslation. - Passes
resourcesandlocaleto the client-side via theI18NProvider.
Step 3: Consuming Translations in Client Components
Once wrapped, any client-side component can easily access translations using the familiar useTranslation hook:
But, first add some translation strings to;
translations/en/home.json
1{
2  "welcome": "Welcome",
3  "description": "This is an English description.",
4  "client-component": {
5    "heading": "This is client component"
6  }
7}
translations/ar/home.json
1{
2  "welcome": "مرحبا",
3  "description": "هذا وصف باللغة العربية.",
4  "client-component": {
5    "heading": "هذا هو مكون العميل"
6  }
7}
Now let's use translations inside client component (src/app/[locale]/client-component.tsx).
1"use client";
2
3import { useTranslation } from "react-i18next";
4
5export default function ClientComponent() {
6  const { t } = useTranslation("home", {
7    keyPrefix: "content.client-component"
8  });
9
10  return (
11    <div>
12      <h2>{t("heading")}</h2>
13    </div>
14  );
15}
Explanation:
- Simply imports
useTranslationhook. - Uses the same keys defined in your translation JSON (
home.json).
Locale Switcher
To allow users to switch between languages on the client side, you'll implement a locale switcher component. This component updates the language preference, persists it in a cookie, and redirects the user to the correct localized route.
src/components/i18n/locale-switch.tsx
1"use client";
2
3import React from "react";
4import { usePathname, useRouter } from "next/navigation";
5import { useTranslation } from "react-i18next";
6import { i18nConfig } from "@/lib/i18n";
7
8export default function LocaleSwitch() {
9  const { i18n } = useTranslation();
10  const activeLocale = i18n.language;
11
12  const router = useRouter();
13  const currentPathname = usePathname();
14
15  const onLanguageChange = () => {
16    const newLocale = activeLocale === "en" ? "ar" : "en";
17
18    // Set a cookie for next-i18n-router to read the new locale
19    const days = 30;
20    const date = new Date();
21    date.setTime(date.getTime() + days * 24 * 60 * 60 * 1000);
22    const expires = date.toUTCString();
23    document.cookie = `NEXT_LOCALE=${newLocale};expires=${expires};path=/`;
24
25    // Compute new path with updated locale
26    if (activeLocale === i18nConfig.defaultLocale && !i18nConfig.prefixDefault) {
27      router.push("/" + newLocale + currentPathname);
28    } else {
29      router.push(currentPathname.replace(`/${activeLocale}`, `/${newLocale}`));
30    }
31
32    router.refresh();
33  };
34
35  return (
36    <div className="widget language-switch-widget">
37      <button
38        className="w-auto cursor-pointer bg-transparent"
39        onClick={onLanguageChange}
40      >
41          {activeLocale === "en" ? "عربي" : "English"}
42      </Button>
43    </div>
44  );
45}
Now you can simply render this anywhere inside your app. Don't forget to wrap it inside I18NProvider - for example if you are rendering it inside root layout (src/app/[locale]/layout.tsx).
1import { getDirection } from "@/lib/utils";
2import { Locale } from "@/lib/types";
3import LocaleSwitch from "@/components/i18n/locale-switch";
4import I18NProvider from "@/components/i18n/translations-provider";
5
6type RootLayoutProps = {
7  children: React.ReactNode;
8  params: Promise<{ locale: Locale }>;
9};
10
11export default async function RootLayout({
12  children,
13  params,
14}: RootLayoutProps) {
15  const { locale } = await params;
16  return (
17    <html lang={locale} dir={getDirection(locale)}>
18      <body
19        className={`${geistSans.variable} ${geistMono.variable} antialiased relative`}
20      >
21        {/* pass locale to client-side i18n provider */}
22        <I18NProvider locale={locale} namespaces={[]} resources={[]}>
23            {children}
24            <LocaleSwitch />
25        </I18NProvider>
26      </body>
27    </html>
28  );
29}
Conclusion
You're now fully equipped to build a multilingual Next.js 15+ App Router application with i18next!
See you in next one.